I know I'm a little behind on the burlap wreath front, but I've been eying them on Pinterest for a while now and I finally had a "free" Saturday to attempt one myself (what is free really, when you have kids?).
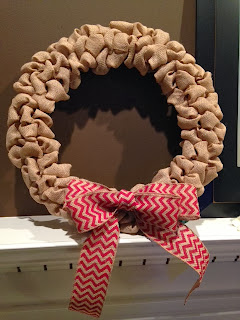
Here is how it turned out:
Here is how it turned out:

Isn't it pretty? I love how simple and elegant it is.
It was surprisingly easy, although nothing is truly easy for me. I like to make things more difficult for myself. For example, I got the wrong size burlap. Eh, oh well. I like the way it turned out, and I'm actually glad I made that mistake. I'll explain why later.
So, what you need to make this gorgeous wreath:
1-2 rolls of 2 1/2-4 in. wide WIRED burlap ribbon (I used a little less than 2 30 ft. rolls of 2 in. wide WIRED burlap)
1 wire wreath frame (pick your size- I did 16 in.)
Any bows you want to add!
***If you don't use a wired burlap ribbon, you might want to check out this blog about using floral wire to secure it-- I didn't have to do that because I used the wired ribbon. :) Also, I found mine at Hobby Lobby... I'm not sure which craft stores have this type of burlap ribbon.***
***If you don't use a wired burlap ribbon, you might want to check out this blog about using floral wire to secure it-- I didn't have to do that because I used the wired ribbon. :) Also, I found mine at Hobby Lobby... I'm not sure which craft stores have this type of burlap ribbon.***
Step 1:
Insert the burlap into the top rung. String in and out through the next two rungs, and bring it out the bottom. (FYI: Your burlap stays on the roll the whole time. This confused me for quite some time, but you'll get the hang of it pretty quickly.)
 | ||
Step 2: From the top rung, pull up a couple inches of fabric (or whatever looks good to you). Twist it to secure it underneath. Then pull up more fabric through the next rung. Squish and mold as you go.
 |
| (This is what it looks like underneath.) |
Step 3: Continue this pattern. Pull up fabric, twist underneath, then pull up more fabric in the next rung. After you get to the bottom rung, start back up at the top.


Eventually you'll start noticing these pretty burlap bubbles. The benefit of the rolls of burlap I used was that they were wired. I could mold and shape the burlap how I liked it. Also, while all burlap wreaths are pretty, I prefer the tighter/cleaner burlap wreaths over the big/loose ones. Using the 2-inch wide burlap helped achieve this look.
Here is what the back of my wreath looks like. I ran out of burlap about 2/3rds of the way through (SO frustrating!).
Here is what the back of my wreath looks like. I ran out of burlap about 2/3rds of the way through (SO frustrating!).

The cool part about this wreath is that you do not have to hot glue anything-- not even the bows! I simply used a safety pin to secure my bow onto my wreath. I've seen others suggest using wires. I plan to change my bows out every season (or when I remember).
Lastly, you may have noticed the picture with lights on my wreath. That's an experiment, really, but I do kind of like it. I bought battery-powered LED lights (THEY MUST BE LED-- ANY OTHER KIND COULD START A FIRE! LED lights do not get hot!). I didn't like how bright and clear they were, so I taped each light with a piece of masking tape to tone it down a little. Then I simply stuck the lights in the burlap, securing it under the wire rim of the frame every so often.
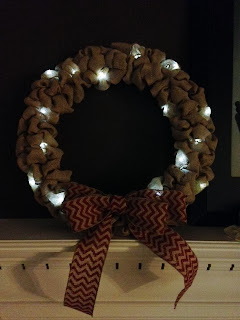

Lastly, you may have noticed the picture with lights on my wreath. That's an experiment, really, but I do kind of like it. I bought battery-powered LED lights (THEY MUST BE LED-- ANY OTHER KIND COULD START A FIRE! LED lights do not get hot!). I didn't like how bright and clear they were, so I taped each light with a piece of masking tape to tone it down a little. Then I simply stuck the lights in the burlap, securing it under the wire rim of the frame every so often.

Something fun and different, I suppose. :)
Burlap wreaths are totally doable. I got the hang of it after the first few minutes, and if I can do it, you can, too!
Burlap wreaths are totally doable. I got the hang of it after the first few minutes, and if I can do it, you can, too!
No comments:
Post a Comment